Wednesday 28 February 2018

Ufufy Marie Cat Cottony Cake


Happy 4th birthday dearest Charissa!! She loves cats so it’s cat again this year LOL. This year the cake is inspired by the cute Disney Ufyfy Marie Cat. I have a soft spot for the round shapes hehe!

Check out the texture of the cakes, it’s really fine, smooth and cottony. I rarely have chances to take crumb shots of my cakes so really happy to be able to take the pictures! The secret is in the consistency of the meringue, and in the use of a whole egg which I use in my newer recipes in Deco Chiffon Cake Basics.


*Updated with recipe (1/3/17)

Ufyfy Marie Cat Cottony Cake
Egg yolk batter
1 whole egg
40 g castor sugar
67 g vegetable/corn oil
70g water
8 vanilla extract
100g Prima cake flour, sifted

Meringue
7 egg whites
1/2 tsp cream of tartar
75 g castor sugar

*Recipe can also be used for a normal 8 to 9-inch pan with removable base.

1. Preheat oven to 160°C. Prepare a tray of water under the lowest rack for steambaking.

2. Beat egg yolks with sugar with whisk till pale and light before stirring in oil, water, and vanilla extract.

3. Add in sieved flour and whisk till no trace of flour found.

4. Meringue: Using an electric mixer, beat the egg whites with ¼ tsp cream of tartar till frothy. Add in half the castor sugar for meringue and whip till soft peaks. Add in all the castor sugar and whip till firm peaks form.

5.Gently fold in the meringue into egg yolk batter in 3 additions.

6. Fill 2 ball pans or bowls till 80% full and bake the chiffon cake for 15 min at 160°C, then 150°C for 10 min and then 140°C for 30+ min, or until skewer inserted into centre of cake comes out clean.

7. Invert the chiffon cake once removed from oven and allow to cool completely.

8. Unmould the chiffon cake by hand (‘Hand Unmoulding Chiffon Cake for a Clean Finishing’ video tutorial).

9. Stack the 2 ball cakes using melted marshmallow or chocolate. The rest of the details were cut from sheet cakes (similar to my books or previous recipes).

Videos of the cake slicing and crumb shots have already been posted on my instagram and fb =).

With lots of love,
Susanne


More lovingcreations here:

3rd book (Basics techniques)     2nd book (Deco)        1st book (Rainbow)

Updates:
Deco Chiffon Cake Basics now on Book depository with free shipping worldwide (and on discount)!

Goguru having 10% discount for Times Privilege members (free sign up).

Happy CNY! 


Read More »

Monday 26 February 2018

Turtle Matcha Custard Cream Puffs

This one of the creative Choux pastry bakes that I had in mind and couldn't wait to use up the excess egg yolks in preparation for a macaron bake!

Turtle cream puffs filled with Matcha custard and topped with Matcha Craquelin!

Here's another view of the fella behind showing his face :)


And I just have to take a close up photo of the smooth and creamy Matcha custard!

Crisp outer shell and smooth, creamy insides full of Matcha goodness. Yums!

My elder kid who is not a fan of cream puffs loved this pastry and wished there were more! I sold most of it to a friend, along with some Rilakkuma vanilla custard cream puffs (will post in the future). This is the first sale I am making for creative choux pastry so I am excited about opening up another avenue of cute and creative bakes!

I am still testing out various recipes to see what I would like to use as a long term default. I adapted the recipe for Choux pastry case and matcha custard (pastry cream) from Little Miss Bento, and the recipe for Matcha Craquelin from here.
I didn't follow exactly the ingredient portions and method from the sources.

Recipe for Matcha pastry cream (custard)
Ingredients:
200ml milk
35g caster sugar
18g cornflour, sifted
5g Matcha powder, sifted
2 egg yolks
1/2 tsp vanilla extract (optional)
10g softened unsalted butter

Steps:
1. Whisk together egg yolks, cornflour, Matcha and sugar in a bowl. Set aside.

2. Heat milk in saucepan until boiling. Remove and pour into egg yolk mixture in a slow and steady stream while whisking the egg yolk mixture continuously.

3. Pour the mixture back into saucepan and heat over medium-low heat while whisking continuously. Keep an eye on the mixture as it will start to thicken suddenly. Take it off the heat to continue whisking if necessary to prevent the custard from becoming lumpy, then put it back on the heat again. Keep heating and whisking until consistency is like smooth curd.

4. Remove from heat and stir in butter and vanilla. Sieve the custard into another bowl and place a cling wrap over the surface, touching the custard. This is to prevent a skin from forming. Refrigerate until ready to fill the Choux pastry cases.

I made Matcha and plain pastry cream. I love the smoothness of the cream!


Recipe for Choux pastry cases

This recipe is similar to the recipe I used previously but this one has more butter, salt and sugar.

Ingredients (makes about 12 turtles):
Matcha Craquelin
50 unsalted butter, softened
55g caster sugar
55g plain flour
1.5 tsp Matcha powder (preferably bakeable type to retain a more vibrant green colour)
Pinch of salt

Choux pastry case
75g water
50g milk
62g unsalted butter
1/2 tsp salt
1/2 tsp sugar
35g bread flour*
40g plain flour*
2 eggs, lightly beaten (may not use all)

* You may use either bread or plain flour only. Bread flour makes the pastry more crispy and stronger in structure but plain flour gives it a more delicate bite.

Steps:
1. Prepare the Craquelin first. Cream butter and sugar in a mixing bowl until pale. Add sifted flour, salt and Matcha powder. Mix well with a spatula until a ball of dough forms. Roll between two baking sheets until thin, about 2-3mm thickness. Freeze the dough until firm (about 15 min). Use a round cookie cutter to cut out disks and place on another baking sheet to freeze until ready to use.

I tried making crisscross patterns using a bench scraper but it didn't turn out too clearly post baking so it's optional. You could try making deeper indents but it is a challenge on such a thin cookie dough

2. Use the same round cookie cutter to trace out circles on a baking sheet. Make sure that there is at least 3-4cm between the circles. That will be the body of the turtle. Place the baking sheet under a silicone mat non your baking tray. You may just use baking sheet if you don't have a silicone mat.

3. Preheat oven to 180℃. Prepare the Choux pastry case. Place water, milk, salt and sugar in saucepan. Bring to a boil while stirring constantly. Once it reaches a roiling boil, pour mixture into the flour.

3. Use wooden spoon or spatula to mix well until a ball of dough forms. Return to saucepan and continue to stir over low heat for 2-3 minutes to cook the dough. Do not brown the dough. Remove from heat and let it cool for about 10 minutes.

4. Add egg a little at a time and mix well with each addition. Towards the end, test the consistency. It should fall off the spatula slowly and leave a streak that doesn't collapse on itself in the batter.

5. Transfer batter into piping bag with a hole cut at the end. Pipe circles according to the template drawn. Pipe the head, legs and tail. Use a finger wet with water to tap down any peaks, especially the small piped parts.

Turtles with Rilakkuma heads

6. Remove the frozen cookie dough from the freezer and gently place each one on top of the turtle.


7. Bake at 180℃ for 20 min followed by 160℃ for another 20min. Turn off the oven and leave it in there for another 10 min. Do not open the oven door during baking as it may cause the pastry to deflate. Use an oven thermometer at all times if possible

Pierce the pastry case with a skewer to release any steam. Cool completely before decorating.

Melt some dark and white compound chocolate with a bit of vegetable shortening. Pipe or paint on the face with a toothpick.

Fill a piping bag fitted with a small piping tip (about 2-3mm) with Matcha pastry cream. Poke a hole in the pastry case and fill with the pastry cream.

Keep refrigerated. Best eaten fresh!

With love,
Phay Shing


Read More »

Sunday 25 February 2018

‘Gudetama’ Tamago Sushi Chiffon Cake


Gudetama, in the form of a Tamago Sushi! Aww isn’t this cute? Can you describe his priceless expression?

This cake was a bit of a crazy experiment. I had the idea of a standing Tamago sushi for a while, but wasn't sure if it would work out =p. I'm glad it did! It was a joy designing it, and it did make me and the recipient smile!

The Tamago was made by baking lemon chiffon cake in a rectangular pan. The rice was from reduced egg yolk vanilla chiffon cake using a super tall chiffon pan (or you can stack 2 short cakes). You can follow the links to their recipes shared previously. The sushi belt was cut from chocolate charcoal chiffon sheet cake (also shared in the previous recipe). The belt was stuck on using melted chocolate or marshmallow.

Hope this made you smile too!

With lots of love,
Susanne


More lovingcreations here:

                 3rd book (Basics techniques)      2nd book (Deco)           1st book (Rainbow)

Updates:

Deco Chiffon Cake Basics now on Book depository with free shipping worldwide (and on discount)!

Goguru having 10% discount for Times Privilege members (free sign up).

Happy CNY! 


Read More »

Thursday 22 February 2018

Princess Carriage Macaron Carousel

I had a request for carriage themed macaron carousel for a wedding. Here's my attempt at making something more elegant and less cutesy :)

Loose pieces of unicorns and carriages were also requested.

I used the reduced sugar recipe for the macaron shells here. Both regular and reduced sugar recipes can be found here. You may refer to my Creative Baking: Macarons book for a systematic presentation of the basics and complex shaped macarons. You may refer to my video tutorials for macaron basics and piping of complex shapes on the blog too.

I decorated the macaron shells using royal icing.

Dark and white chocolate filling was requested so I filled the middle with dark chocolate ganache and the outer layer with white chocolate. In my earlier days of making macaron carousels, I was very concerned about structural stability in Singapore's hot weather so I didn't dare to use regular ganache for the filling, but instead use chocolate with vegetable shortening as the filling. Now that I have more experience, I use two types of fillings for carousels. A yummier, softer filling for the middle, and a more aesthetic looking and firmer filling for the outer ring. Not sure why it took me so long to figure it out from an engineering standpoint 😅. The white chocolate filling doesn't contain heavy cream but instead uses vegetable shortening as the base. I added a little lemon juice to make the white chocolate taste less sweet.

Here's the recipe for the white chocolate filling.

White chocolate filling
Ingredients:
100g white compound chocolate
25g vegetable shortening
1/4 tsp salt
1 tsp vanilla extract/ bean paste
1 tsp lemon juice

Steps:
1. Place white chocolate and vegetable shortening in a microwave safe bowl. Heat for 10-20 sec at medium power. Stir to mix well. Repeat until melted and smooth.

2. Add salt and mix well. Add vanilla gradually and mix well. Add lemon juice gradually and mix well. Don't add the liquids all at once or the chocolate mixture may seize.

3. Let the mixture sit at room temperature to firm up a little until toothpaste consistency. Transfer to piping bag to fill the shells.

This is how I fill the central pillar of the macaron carousel. Center filled with dark chocolate ganache and outer ring with white chocolate 

I am finally investing in some pretty boxes for macaron carousels. Many thanks to a friend for helping me to order some!


With love,
Phay Shing

Read More »

Tuesday 20 February 2018

Pastel Pusheenicorns Chiffon Cakes


Can you spot the cakes among plushies? =p

Who loves Pusheenicorns and pastel colours?

Excited to be collaborating with Pusheen to design some cakes for their new pastel series! I will be sharing more on how to make the small Pusheen cakes in my upcoming posts! =)

Hope you had a blessed and good Lunar New year break!

Best wishes,
Susanne

Honored to be featued by Pusheen's official Instagram and FB accounts! 


Happy CNY! Honored to be featured on Instagram's official account!


Answer: The cakes are the pink, purple and mint! From the pastel pusheenicorns series =)


Read More »

Monday 19 February 2018

Hedgehog Cream Puffs

When I made the doggy cream puffs, I made these hedgehogs at the same time too :)

Surprise!

I have a few ideas popping up for cute Choux pastry because there's just so much potential for it to be creative with! Due to the lack of time, I won't be able to do too many or often. But I am really excited about this creative avenue because finally my excess egg yolks have somewhere to go! Working with macarons, Swiss meringue buttercream and chiffon cakes mean that I am almost always left with excess egg yolks. I am currently using recipes that use whole eggs for Choux pastry but I may try those that use only yolks in the future.

Recipe for Choux pastry is adapted from here.

Ingredients (Makes about 12 hedgehogs):
60g water
40g milk
40g unsalted butter
1/8 tsp salt
1/4 tsp sugar
30g bread flour
30g plain flour
2 eggs, lightly beaten (you may not use all of it)
1.5 tsp cocoa powder

Steps:
1. Preheat oven to 180℃ and set oven rack to middle. Sift bread flour and plain flour into a bowl.

2. Place butter, water, milk, salt and sugar in a saucepan. Bring to a boil while stirring. Pour into flour and mix until well combined.

3. Pour mixture back into saucepan and cook for another 2-3 minutes to let more moisture escape from the dough. Divide the dough into 1:3 for plain : brown dough

4. Colour the brown dough by adding sifted cocoa powder. Mix well. Leave the dough to cool for 10 minutes.

5. Gradually add beaten egg into the plain and brown dough. Mix well with spatula with each addition. You may use an electric mixer with dough hook to incorporate the eggs in if you wish. When the batter is able to fall off the spatula slowly and leave a streak that doesn't collapse on itself in the batter, stop adding more egg.

6. Transfer most of the batter into piping bag with a hole of about 0.5-1cm cut. Transfer a small portion of each colour of batter into another piping bag with a small hole (3mm) cut.

7. Pipe a large round dollop with brown batter and triangular shape with plain batter. Both using piping bag with a bigger hole. Use a toothpick to nudge the batter at the boundary to create a wavy "fringe". Pipe the ears and spikes using piping bags with small hole cut. Use a finger wet with water to nudge the batter where it gets out of shape, especially the snout.

Piped hedgehogs and a corgi!

8. Bake for 20 minutes. Reduce temperature to 160℃ and bake for another 15-20 minutes or until golden brown. Underbaking will cause the pastry to collapse when cooled. I used a lower temperature than regular Choux pastries as I didn't want the small parts to burn. You could bake at 180-200℃ all the way until golden brown instead if it's just piped rounds (profiteroles/cream puffs) or logs (eclairs)

8. Pierce the Choux pastry once out of the oven to release any steam inside. Cool completely on cooling rack before decorating and filling.

Melt some dark chocolate with a bit of vegetable shortening to make the chocolate for decorating the pastry. If you are just coating the pastry, prepare dark chocolate ganache instead. Pipe or paint on the eyes and nose of the hedgehogs.

If you want an awesome tasting traditional pastry filling, go for half filled with pastry cream (custard) and half with whipped cream. I didn't have time to prepare the pastry cream so I only filled them with lightly sweetened whipped cream. But if you would like an awesome pastry cream recipe, you may refer to this post. I included the recipe for apple pie filling that goes extremely well with the pastry cream too. If you have your own preferred Choux pastry filling, go ahead and fill it with whatever your palate desires... Durian puree, chocolate cream, Matcha and Azuki bean cream, strawberries and cream etc, etc

Whipped cream
Ingredients:
200ml whipping cream/ heavy cream (35% fat)
2 tbs (about 13g) icing sugar
1 tsp gelatin powder
1 tbs water
1/2 tsp vanilla extract.

Steps:
1. Place whipping cream and icing sugar in mixing bowl. Chill in fridge.

2. Scatter gelatin over water in a microwave safe bowl. Let the gelatin sit in water for a few minutes. Use the microwave to heat at medium power for 10 sec. Stir to dissolve the gelatin.

3. Add a tbs of cream and vanilla extract to the gelatin. Stir to mix well. Let it cool to room temperature.

4. Use an electric mixer to beat the cream with sugar at low speed until it starts to thicken. Increase the speed a little and when soft peaks form, start adding the gelatin mixture gradually while whisking the cream by hand to incorporate. Continue beating the cream at low speed until firm peaks form. Be careful not to overbeat or it will separate.

Freshly whipped cream

5. Slice off the top of the Choux pastry case. Fill a piping bag fitted with the whipped cream and fill the pastry case with the whipped cream. Refrigerate for at least two hours before consuming. If you want to, you may freeze it (do not freeze pastry cream filled choux pastries)

Choux pastries are best consumed freshly made. They are still good the next day. If you are particular about having them crisp, fill them only when you are about to consume. Baked unfilled pastries can be kept in airtight containers and toasted to make them crisp again. Unfortunately those decorated with compound chocolate cannot be toasted again or the chocolate will burn.


With love,
Phay Shing
Read More »

Wednesday 14 February 2018

'Kumquat Pot' Chiffon Cupcake


Wishing everyone a 大吉大利 with this little 'Kumquat Pot' Chiffon Cupcake I made from mandarin orange chiffon sometime back! Recipe from 'Ji' Mandarin orange chiffon cake from my 2nd cookbook Deco Chiffon Cakes.

Have a great holiday!! And a blesssed time of reunion with your loved ones!

新年快乐!阿够够旺旺过好年!


Best wishes,
Susanne


Another good news to share, the Chinese edition of Deco Chiffon Cake Basics is just on book depository!


Read More »

Raspberry Dark Chocolate Chinese New Year Macarons (shells made with raspberry Italian meringue)

I was tending to two last minute requests for Valentine's Day rose macarons and thought why not include a small number of Chinese new year related macarons too since I planned to make a batch large enough to have some spare capacity. I made these without preparing a template but instead used circle template as guides.


You may refer to this post for the detailed recipe for macaron shells and the links for raspberry white chocolate and dark chocolate ganache filings. As mentioned in that earlier post, I would test out doubling the amount of raspberry puree used in the Italian meringue and reduce the amount of water accordingly. I love the resulting Italian meringue with a more noticeable pink shade, stronger raspberry flavour and aroma! The meringue actually had a slightly sour aftertaste!

Raspberry Italian meringue made using 20g puree and 35g water

I was running low on red batter after piping the Valentine's Day macarons so the bottom shells are piped this way...


There seems to be no noticeable difference in the ease of working with higher percentage of raspberry puree in the Italian meringue, except that the batter could become more hygroscopic (tends to absorb moisture from the air). Longer drying times seem to be needed and the membrane formed may be a little weaker if not dried long enough. As such, you may choose to use a lower percentage of raspberry puree if you don't want to wait for too long for the shells to dry.

I used black edible marker and royal icing to decorate the shells.

Freshly baked and decorated! Forgot to put the blusher on the boy and girl macarons when I took this photo.

Raspberry and dark chocolate combi is an excellent choice as they are both strong flavoured and reduce the overall sweetness of the confectionery.

Filling the shells.

Blessed Chinese New Year to all!

With love,
Phay Shing

Read More »

Monday 12 February 2018

Doggy Cream Puffs

I have been wanting to make another doggy bake in time for Chinese New Year and contemplated making cute doggy buns. But inspiration strikes in another way and I came up with doggy Choux pastry instead. It's been a few years since I made famcy shaped Choux pastry and I have been contemplating playing with them again at some point because they have potential to be creative with. Presenting my humble attempt at making doggy cream puffs!

Corgis and beagles!

My younger kid who is a fan of cream puffs really loved this and said I should sell them and make some for his teachers because they taste really good. (Not making for his teachers because I am not sure they will survive the heat and a kid's rough handling 😆). He wiped out almost the whole batch of cream puffs, restraining himself only because he couldn't bear to finish them all!

Choux pastry recipes are more or less standard. The key is still in the technique of making sure the batter consistency is right and baking conditions.

I adapted my recipe from here. The only modification I made was to use half bread flour and half plain flour instead of only bread flour. Some recipes call for a little bread flour or none at all. I chose to go somewhere in between. Bread flour helps to make the pastry crispier but the lower protein plain flour helps it to be more tender.

Recipe for Choux pastry
Makes about 10 doggy cream puffs
Ingredients:
60g water
40g milk
40g unsalted butter
1/8 tsp salt
1/4 tsp sugar
30g bread flour
30g plain flour
2 eggs, lightly beaten (may not use all of it)
Cocoa powder

Steps:
1. Sift flours and set aside in a bowl. Preheat oven to 180℃ and set oven rack to middle position. Use an oven thermometer at all times if possible as actual temperature may be different from oven setting.

2. Place water, milk, butter, salt and sugar in saucepan. Bring to a boil while stirring constantly. Once it reaches a roiling boil, pour mixture into the flour.

3. Use wooden spoon or spatula to mix well until a ball of dough forms. Return to saucepan and continue to stir over low heat for 2-3 minutes to cook the dough. Do not brown the dough. Remove from heat and let it cool for about 10 minutes.

4. Add egg a little at a time and mix well with each addition. Towards the end, test the consistency. It should fall off the spatula slowly and leave a streak that doesn't collapse on itself in the batter.

5. Transfer to piping bag fitted with a 2-2.5cm round tip. Pipe logs of about 5cm in length. If you don't have a 2cm piping tip like me, you may use round cookie cutters or even jumbo straws and stick to piping bag or ziplock bag :).

6. You may add a little cocoa powder to a small portion of batter to colour it dark brown for the ears. Transfer a little plain batter into piping bag with a small hole cut. Pipe the legs, tail, ears and snout. Wet a finger with water to tap down any peaks that occur from piping, especially the small parts. This also prevents them from burning when baking.

Piped doggies!

7. Bake for 20 minutes. Reduce temperature to 160℃ and bake for another 15-20 minutes or until golden brown. Underbaking will cause the pastry to collapse when cooled. I used a lower temperature than regular Choux pastries as I didn't want the small parts to burn. You could bake at 180-200℃ all the way until golden brown instead if it's just piped rounds (profiteroles/cream puffs) or logs (eclairs)

8. Pierce the Choux pastry once out of the oven to release any steam inside. Cool completely on cooling rack before decorating and filling.

Melt some dark and white compound chocolate with a bit of vegetable shortening to make the chocolate for decorating the pastry. If you are just coating the pastry, prepare dark chocolate ganache instead.

If you want an awesome tasting traditional pastry filling, go for half filled with pastry cream (custard) and half with whipped cream. I didn't have time to prepare the pastry cream so I only filled them with lightly sweetened whipped cream. But if you would like an awesome pastry cream recipe, you may refer to this post. I included the recipe for apple pie filling that goes extremely well with the pastry cream too. If you have your own preferred Choux pastry filling, go ahead and fill it with whatever your palate desires... Durian puree, chocolate cream, Matcha and Azuki bean cream, strawberries and cream etc, etc

Whipped cream
Ingredients:
200ml whipping cream/ heavy cream (35% fat)
2 tbs (about 13g) icing sugar
1 tsp gelatin powder
1 tbs water
1/2 tsp vanilla extract.

Steps:
1. Place whipping cream and icing sugar in mixing bowl. Chill in fridge.

2. Scatter gelatin over water in a microwave safe bowl. Let the gelatin sit in water for a few minutes. Use the microwave to heat at medium power for 10 sec. Stir to dissolve the gelatin.

3. Add a tbs of cream and vanilla extract to the gelatin. Stir to mix well. Let it cool to room temperature.

4. Use an electric mixer to beat the cream with sugar at low speed until it starts to thicken. Increase the speed a little and when soft peaks form, start adding the gelatin mixture gradually while whisking the cream by hand to incorporate. Continue beating the cream at low speed until firm peaks form. Be careful not to overbeat or it will separate.

Freshly whipped cream!

5. Fill a piping bag fitted with a 3mm tip. Poke the tip into the pastry and fill it with cream. Refrigerate for at least two hours before consuming. If you want to, you may freeze it (do not freeze pastry cream filled choux pastries)

Showing off a corgi butt with a little cream peeking out from where I inserted the piping tip 😆. This picture was taken a little past 6a.m. as the boy happily ate it for breakfast

Choux pastries are best consumed freshly made. They are still good the next day. If you are particular about having them crisp, fill them only when you are about to consume. Baked unfilled pastries can be kept in airtight containers and toasted to make them crisp again. Unfortunately those decorated with compound chocolate cannot be toasted again or the chocolate will burn.

I hope this gives you inspiration to try other creative doggy bakes other than doggy cookies and pineapple tarts that many people have been making for the year of the dog. I am sure it will delight your guests as well!

Checkout some cute hedgehog cream puffs that I made at the same time as these doggies!

With love,
Phay Shing

Read More »

Saturday 10 February 2018

‘Avocuddle’ Avocado Chiffon Cake


Anyone needs an avocuddle? <3

Sharing a simple and cute bake since Valentine's day is coming =). These were inspired by Queenie's cards. When I first saw it, I just let out an "awww...". 

Avocado Chiffon Cake
3 egg yolks
20g castor sugar
40g vegetable/corn oil
40g water
60g Prima cake flour, sifted
Avocado paste (1 ripe avocado blended with 1 tsp lemon juice)
Natural green coloring (optional)

4 egg whites
45g castor sugar
¼ tsp cream of tartar

1. Prepare the avocado paste by blending 1 ripe avocado with 1 tsp lemon juice.

2. Preheat oven at 160°C. *I used steam baking like ogura cakes but it is optional.

3. Beat egg yolks with sugar with whisk till pale and light before stirring in oil, water and avocado paste.

4. Add in sieved flour and whisk till no trace of flour found.

*To get the shade of green, I added few drops of natural Magic colours green colour to the batter.

5. Meringue: Beat the egg whites with ¼ tsp cream of tartar till firm peaks, mixing in caster sugar in 2-3 additions.

6. Fold in the meringue gently into the batter 1/3 at a time using a flexible spatula.

7. Pour into 2 oval pans (around 6-inch) and gently tap on table gently to remove air bubbles.

*You can also bake this in a normal 7-inch tube pan.

8. Bake for 160°C 15 min, then 140°C for 30+ min, or until skewer inserted into centre comes clean.

9. Invert once out of the oven and unmould by hand when cake is cool (see 'hand unmolding chiffon cakes for a smooth finishing' video).

Bake avocado sheet cake (1 egg recipe enough) and charcoal sheet cake for cutting out the details. Glue on using melted marshmallow. The arms and feet were cut from string candy.

If you are lazy to blend avocado, here’s another alternative! You can use pandan chiffon cake for the avocado instead.

Pandan chiffon cake
3 egg yolks
20g castor sugar
39g vegetable/corn oil
26 g coconut milk
15 g pandan juice
2 g vanilla extract
5 g pandan paste
60g cake flour
A pinch of salt

Meringue:
4 egg whites
45g sugar
1/4 tsp cream of tartar

Never forget to give our loved ones an avo-cuddle! =) =p

With lots of love,
Susanne


More loving creations here..


Read More »

Thursday 8 February 2018

Ondeh-Ondeh Pandan Gula Melaka Mini Cakes (sweetened only with Gula Melaka!)

Have you ever wondered what kind of cakes are more diabetic friendly without resorting to artificial sugar and yet still tastes awesome? I have considered this question because my mother has diabetes and I always keep in mind how to create such cakes for family birthday celebrations. I made one such cake that was so well received last year that I decided to teach this at ToTT, but a smaller version here. Presenting my Ondeh-Ondeh Pandan Gula Melaka mini cakes!


Why do I highlight the use of Gula Melaka as the only sweetener used here? Because coconut palm sugar or Gula Melaka has a glycemic index of about a third of refined white sugar. This makes the whole dessert more diabetic friendly without compromising the flavour, unlike some artificial sweeteners which may leave a chemical taste in the mouth.

In this class, you will learn how to bake Pandan Gula Melaka chiffon sponge without using white sugar at all. Only Gula Melaka is used as the sugar. The chiffon sponge layers have Gula Melaka pudding layers in between them that breaks the monotony of the chiffon sponge and adds that extra moisture and smoothness to the dessert. You will learn how to make this pudding that's so good you can even eat it on its own, and how to assemble it with the sponge cake. This delectable and fragrant cake is topped with sweet potato Ondeh-Ondeh, all naturally coloured and flavoured too! You will learn how to make plain and checkerboard patterned Ondeh-Ondeh in this class.

This is essentially a class for learning how to make two separate desserts combined into one, so the class is a longer 4-hour one. Please click on this link to sign up at the ToTT website.

With love,
Phay Shing


Read More »

Monday 5 February 2018

Chinese New Year Chiffon Cupcakes


Here's my cute CNY couple wishing everyone a Happy Chinese New Year!

I'll be making some CNY-themed chiffon cupcakes (hands-on decorating class) at Centrepoint on 2nd and 9th Feb, 2pm. The "lantern and fan" was for 2nd Feb. The "CNY couple" will be on 9th Feb.

The classes are already full so I have removed the registration link. This post is more to archive the picture as I am tonnes of pictures still in my computer and I will lose the moment if I don't post it now, knowing myself! =p Thanks for bearing with me!

For recipes on how to make chiffon cupcakes, you can refer to the cookbooks, especially Deco chiffon cake Basics has detailed step-by-step on how to make them. Or you can refer to the previous posts.

Thank you!

With lots of love,
Susanne


Read More »

Unicorn Macaron Carousel on Strawberries N Cream Chiffon Cake

My friend requested for unicorn macaron carousel on top of a cake for her niece's birthday. She also requested for a less sweet bake so I made the macaron carousel and cake with this in mind. Although I have done macaron carousels many times over, I chose to do it a little differently, by including some fresh fruit puree in the filling without compromising structural stability. Presenting my first macaron carousel on top of a strawberries n fresh cream vanilla chiffon cake!

Pardon the yellowish hue as I had to take photo using indoor lighting during a rainy day.

The carousel alone deserves a photo on its own!

I took this using natural light a couple of days before I made the cake

You can't tell how relieved and overjoyed I was when I got the news that everyone loved the looks and taste of the bake and it was indeed not too sweet!

Bear with me as this bake is made up of so many components, this is going to end up being a long blog post.

I used the reduced sugar recipe for the macaron shells here. Both regular and reduced sugar recipes can be found here. You may refer to my Creative Baking: Macarons book for a systematic presentation of the basics and complex shaped macarons. You may refer to my video tutorials for macaron basics and piping of complex shapes on the blog too.

Strawberry filling was requested, to match the strawberry filling of the sponge cake. I came up with two different types of strawberry filling that can withstand storage at warm Singapore' room temperature for a week. The "ganache" which contains cooked fruit puree adds that extra flavour but is not structurally firm enough so I have to make strawberry white chocolate that doesn't use fresh fruit puree as well. I whipped the "ganache" to give it a lighter texture. I mention "ganache" instead of ganache because no dairy cream is used. I will share the recipe for both types of strawberry filling.

Recipe for whipped strawberry "ganache"
Ingredients:
Cooked strawberry puree
70g strawberry puree (blend fresh strawberries)
A pinch of salt
1 tsp lemon juice
1/2 tsp caster sugar

Strawberry ganache
75g white chocolate, chopped
28g vegetable shortening
1/8 tsp salt
35g cooked strawberry puree
1/2 tsp strawberry emulco

Steps:
1. Prepare cooked strawberry puree. Place all ingredients in a small saucepan and cook over low heat, stirring constantly. Continue to do so until mixture thickens to jam-like consistency and about half the original volume.

Cooked strawberry puree

2. Melt white chocolate and shortening using microwave oven or double boiler. Be careful not to overheat and stir often. Once mixture is melted and smooth, add salt and mix well. Chill the mixture in fridge or freezer for a couple of minutes.

3. Use a spatula to whip the mixture. Return to chill if necessary. Repeat chilling and whipping until mixture resembles buttercream.


4. Gradually add cooked puree and strawberry emulco and mix well after each addition.

Transfer into piping bag.

Recipe for strawberry white chocolate
Ingredients:
80g white chocolate, chopped
20g vegetable shortening
1.5 tsp strawberry emulco
1/4 tsp salt

Steps:
1. Melt white chocolate with shortening in the same manner as above for the "ganache".

2. Add salt and mix well. Gradually add emulco, half a tsp at a time and mix well.

3. Let it firm up at room temperature until toothpaste-like consistency.

Transfer into piping bag.

Assemble the unicorns using the firmer strawberry white chocolate only. The rest of the shells in the central pillar can be filled with the "ganache" in the middle and the firmer strawberry white chocolate on the outer ring.


Store the macaron carousel in a cool place, preferably air conditioned, in a fairly airtight ccondition. You may refrigerate the carousel but so far I have been storing at cool room temperature to avoid drying out the filling too much. Macaron carousels can keep for a week out of fridge with no problems.

I chose to bake the sponge in a chiffon tin as I wanted to make a naked version of vanilla sponge with strawberries n cream. The sides and top of the cake looks the cleanest when baked in a tube pan. And so I baked one 7" (17cm) chiffon cake and a 7x7" thin layer of sponge at the same time. The thin sponge is to cover the hole of the chiffon cake when I fill it with strawberries and cream.

Recipe for vanilla chiffon cake
Ingredients (makes one 17cm chiffon and one 7x7" layer cake):
Egg yolk batter
4 egg yolks
5g caster sugar
56g canola oil
56g fresh milk
80g cake flour
1/8 tsp salt
2 tsp vanilla extract

Meringue
5 egg whites
65g caster sugar
1/4 tsp cream of tartar

Steps:
1. Preheat oven to 150℃. Set oven rack to lowest position. Place a tray or bowls of water at base of oven to create steam (optional). Line 7x7" baking tray with parchment paper.

2. Prepare egg yolk batter. Whisk egg yolks and sugar for a few minutes until pale and thick. Gradually add oil and whisk until well combined. Gradually add milk and vanilla and whisk well. Gradually sift in flour and salt and whisk until no trace of flour is seen.

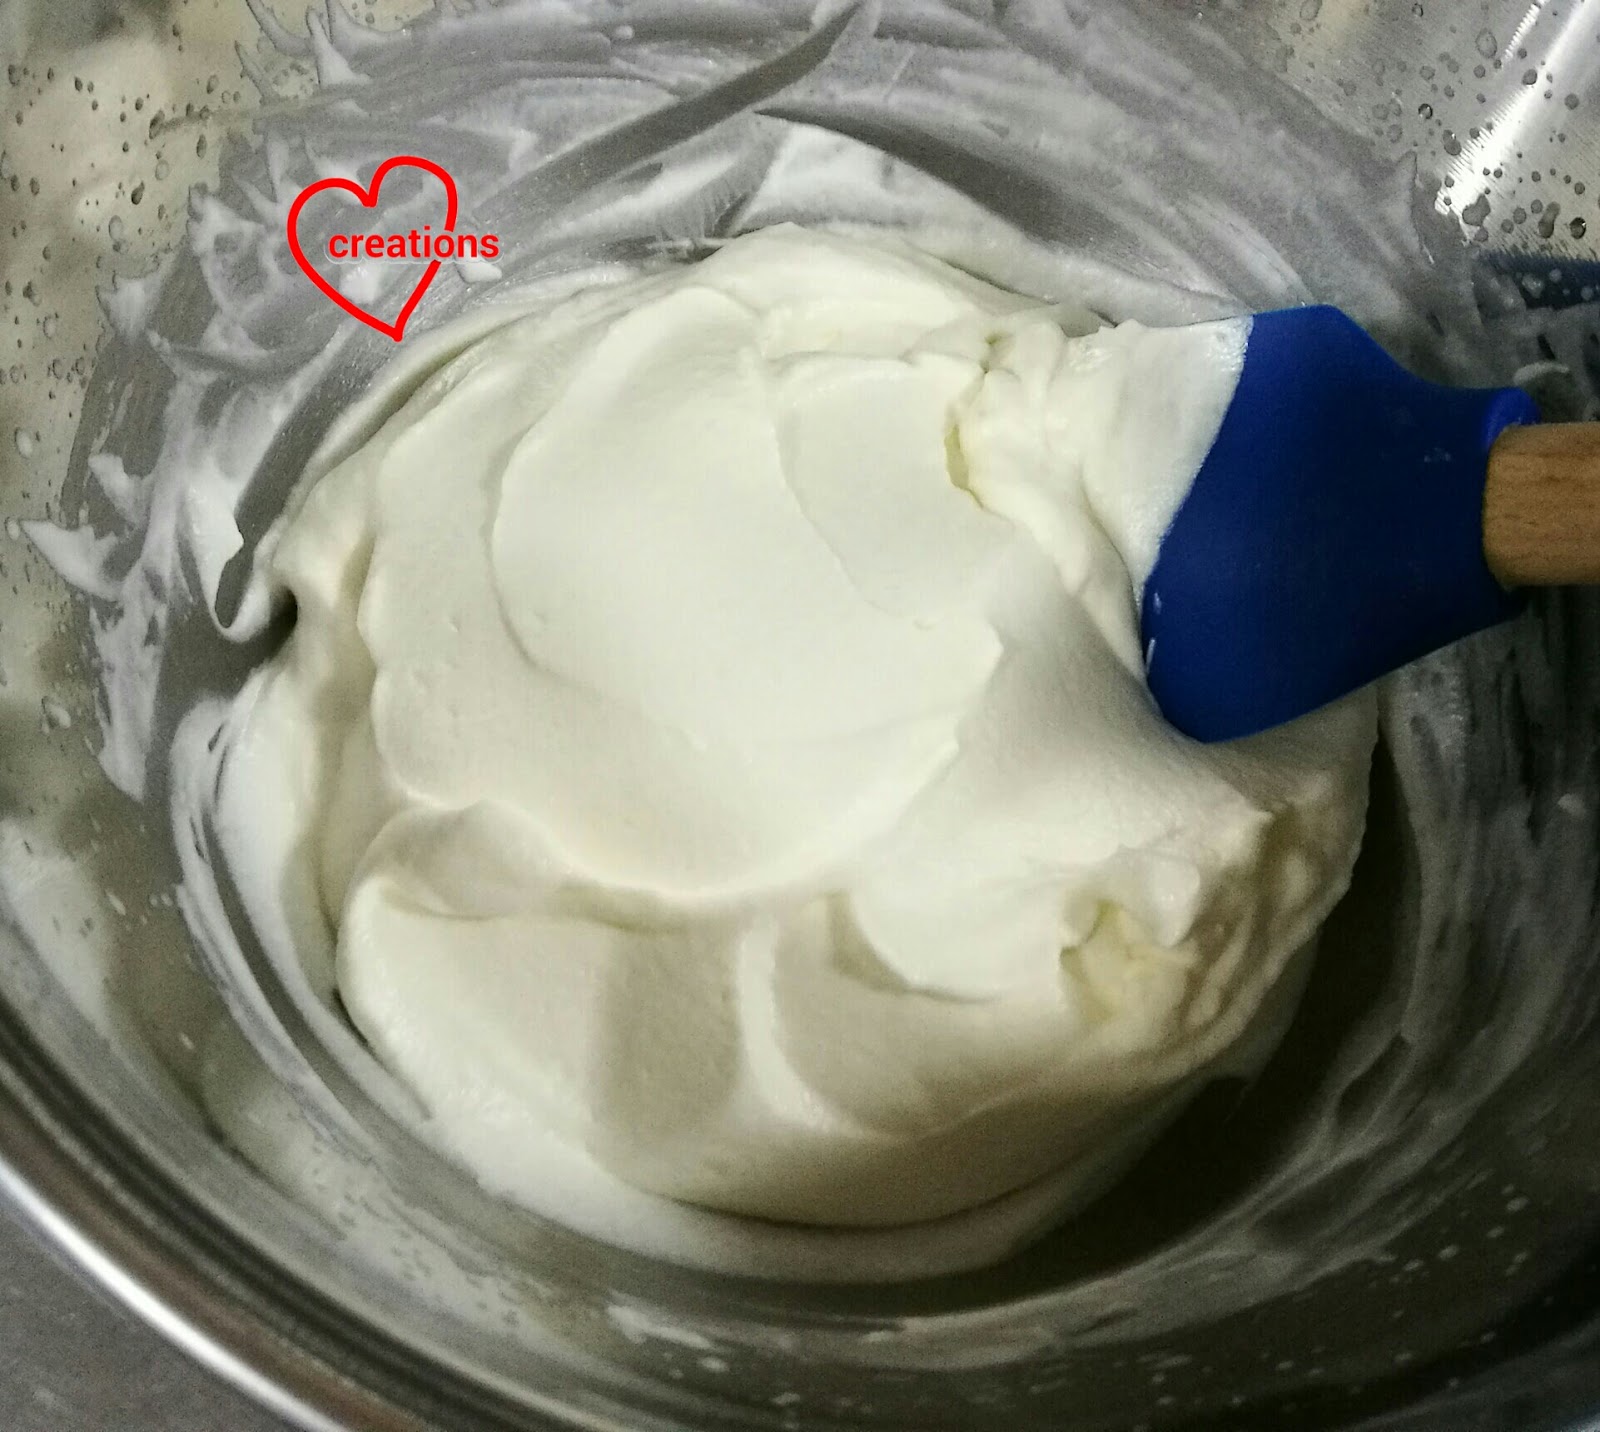
3. Prepare meringue. In a clean metal bowl, beat egg whites with cream of tartar until firm peaks form, gradually adding in sugar once the egg whites are foamy.

4. Quickly but gently fold the meringue into the egg yolk batter in three additions. Scoop some batter into the prepared tray and slowly pour the rest of the batter into chiffon tin. Gently tap the tray and tin on the table to release trapped air bubbles.

5. Bake the layer cake for 12-15min or until toothpick comes out clean. Immediatwly flip the cake out onto another parchment paper and cool completely. Reduce temperature to 130℃ and bake for 30 min. Reduce temperature to 115℃ and bake for another 10 min or until skewer comes out clean. Immediately invert the tin to cool completely before carefully unmoulding by hand. Please note that every oven behaves differently so use this temperature as a gauge. You just want to achieve a chiffon sponge that rises slowly and doesn't brown too much at the base and sides, and yet baked through such that it doesn't collapse.

Freshly baked vanilla chiffon cake!

Depending on how many layers of sponge you want for the final cake, use a ruler and toothpicks to mark out where you want to cut the cake. Use a long serrated knife to carefully slice the cake horizontally.

Cutting the chiffon cake into 3 layers.

As refrigeration is not an issue and venue of celebration is at a hotel, I decided to use pure dairy cream as the filling because it tastes the best and only a little sugar is added, as compared to heavier buttercream. Even Swiss meringue buttercream which is lighter than traditional American buttercream contains a lot more sugar than fresh dairy creams. I didn't stinge on the strawberries as well, using a full box of it for a 17cm cake. I have to admit this was a very brave choice in view of Singapore's weather. Most bakers would opt for non-dairy cream or partial dairy cream with stabilizers added to have a peace of mind. You can understand how nervous I was 😅. So I was thankful that it remained stable until it was consumed and remained delicious till the end.

Recipe for filling
Ingredients:
Filling
300ml heavy cream
3tbs icing sugar
1.5 tsp gelatin powder
1.5 tbs water
1 tsp vanilla extract
1 box of Korean strawberries (about 250g), halved

Syrup
10g sugar
25g hot water
1/2 tsp vanilla extract

Steps:
1. Prepare the syrup. Dissolve sugar in water. Add vanilla extract. Set aside.

2. Prepare the cream. Pour the cream into a large mixing bowl. Add icing sugar and whisk until combined. Chill in fridge. In the mean time, scatter gelatin on water in a small microwave safe bowl and let the gelatin bloom for a few minutes. Microwave for 10 seconds at medium power. Stir to dissolve the gelatin. Add vanilla and a tbs of cream from the mixing bowl, and stir to mix well. Set aside until cool to room temperature. Whisk the cream on low speed until it starts to thicken. Increase mixer speed and continue to beat until soft peaks form. Gradually add gelatin mixture. And whisk the cream by hand until firm peaks form.

3. Place the bottom layer of cake on cakeboard. Brush some syrup on the surface of the cake. You may either pipe the cream on or use a cake ring/ springform pan for the assembly. I chose to use a clear plastic cake ring for this. Arrange the cut strawberries in a layer and scoop the cream on top, filling the spaces.


4. Place the middle sponge layer on top and gently press it down. Repeat step 3 for the second layer of filling and top layer of sponge. Chill the assembly with cling wrap covering the top sponge for at least 2h. Carefully remove the cake ring.

I included four straws in the middle as dowels to support the heavy macaron carousel.

The cake is best consumed a day after assembly, such that it is still fresh but enough time is given for the filling to mature with the sponge.

You may want to prepare a few packets of ziplock bags filled with water and frozen to use as ice packs for transport. This is to ensure that the cake stays chilled throughout.

Creating bakes that are yummy and pretty at the same time still remain my priority as I don't skimp on good ingredients and am always mindful of techniques. Really happy that it was well received!

With love,
Phay Shing

Read More »